Showing posts with label edgerton. Show all posts

Sunday, November 6, 2011

Scooter Battery Replacement

The original Deathscooter battery was kindly made for the Engineering Design Workshop by Shane Colton. Unfortunately, Shane was pressed for time, so he accidentally wired the battery backwards. We discovered this after we connected the motor controller to the battery and the connection exploded. The wires' colors were 'reversed' via heatshrink tubing, and two new deans connectors were soldered to where the old ones used to be. Oh, and the battery didn't have any balance wires either. This battery should not exist. And so in August I built a new battery pack (same specs: A123 8S2P 4400 mAh 26.4V) to replace the old one. On that fine summer day, I did everything except attach the connectors, which is, you know, kind of important.

2.5 months later, I finally got around to finishing the pack. The reason I hadn't done this sooner is that the battery pack that Shane built hadn't exploded yet, and was still performing well despite my extensive usage sometimes requiring multiple ~70% capacity charges per day. The reason I got around to doing it is the darn thing was sitting in N52 almost fully assembled, and I should really be using the pack with balance wires.

Alright here we go. The first step is to put these little tiny connectors on each of the balance leads and put them in a plastic holder so it can be plugged into the charger. A note for anyone trying to build their own pack: do NOT try to strip, solder, or do anything else to two balance leads at the same time. If you try to cut or strip them both at the same time, they will short together on whichever metal cutting tool you have chosen for the task. You and your pack will not be happy. Strip one wire at a time, solder the connecter, crimp, place in the holder. Repeat as necessary, in that order.

Soldered the deans connector onto the main wires. Pack is operational.

- black white brown backwards rainbow +

And we have our fully operational balanced pack!
Looks like we're done for the day. NOPE.
The pack doesn't fit inside the battery bay on the scooter because the wire sticks out the top instead of the side on part of the pack. The segment of wires in front of the conveniently (and accidentally) placed cinnamon toast crunch box needs to be moved from the top to the side.
Carefully slicing open the pack, I am terrified of cutting a wire or worse, shorting two wires with my knife blade. Luckily neither of those things happened.
Black wire was pushed over to the side, and the pack is ready to be sealed up. Wait...where's my duct tape? Crap. Well, floor mate Julia to the rescue... 

Probably the most colorful pack I will ever make.
It fits!

And so Deathscooter was made a bit more colorful. 

Note: I will still not ride this machine until I get a new front wheel, which is in the mail as of tomorrow (hopefully).

Saturday, October 22, 2011

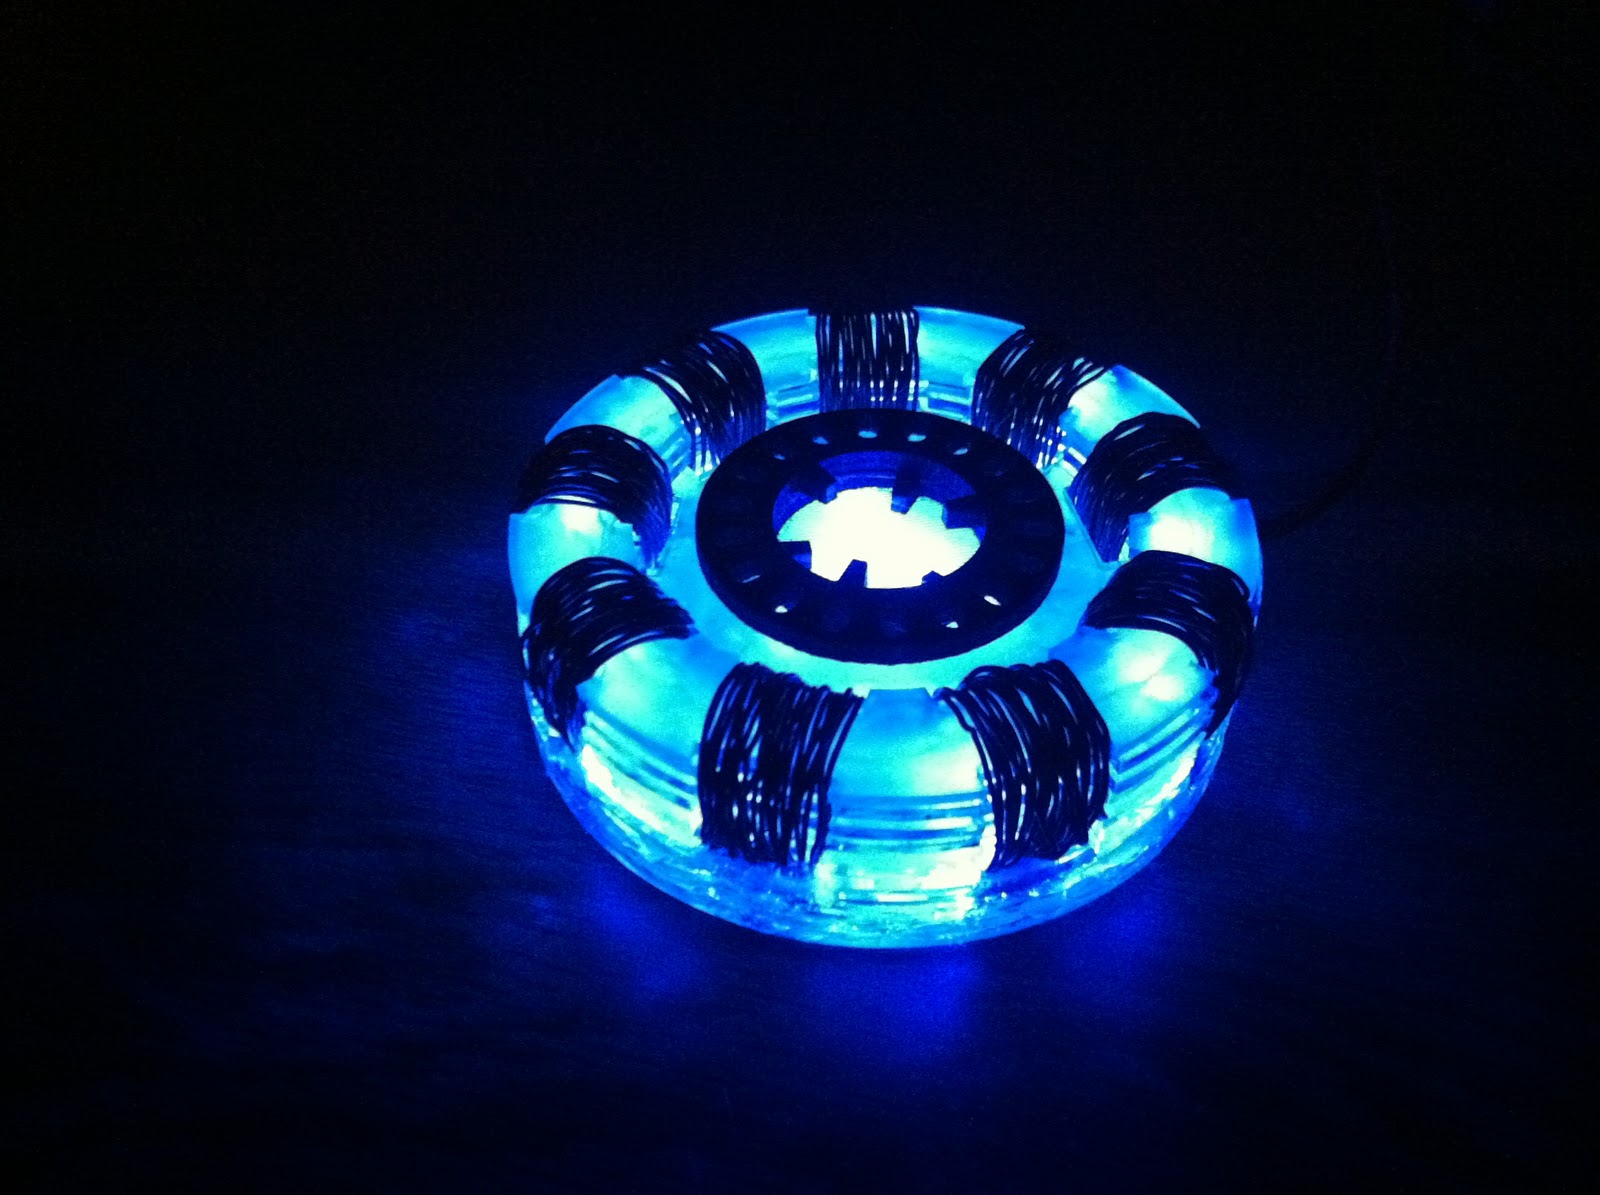
Halloween 2011: Arc Reactor Completed!

Original post here.

First, I'd like to thank Barry and Ben for their help on this project.

After helping out with the WISE program in the morning, I got to work on my arc reactor. I got on the 60 watt epilog around 4, and cutting took about an hour. During this hour, I managed to cut all of the pieces out, and also set fire to some of the kibble from others' projects that had fallen through the grate. I didn't notice this when I was actually cutting the pieces, so the fact that my (what were supposed to be) beautiful acrylic pieces had been toasted certainly put a damper on my day... but not for long! I decided that the pieces needed to be roughed up a bit to get the right amount of light out the front of the reactor, so some sand papered pieces did the trick to distract from the burned parts. I didn't take any pictures because I was too busy hurting my wrist trying to hold on to the thing while sanding it.

I tested each of the 12 3mm LEDs from oznium, and then hot-glued them into their respective slots. Several sticks of hot-glue and ~50 feet of enameled magnet wire later, we have something that resembles a whole bunch of acrylic circles stuck together with some wire wrapped around it.

This is taking way longer than anticipated.

I'm glad I found a use for the wire I took off those printer stators.

On to the electronics. The LEDs were soldered together 4 in parallel, 3 in series. Each string of 3 leds was paired with a 180 Ohm resistor, to give about 35 mA per LED strand.

Not pretty at all, but it's 10:30 and I want to get out of here.

After loose wires were trimmed and glued down to avoid short circuits, the back was glued on, the wires to the battery were added, and I was ready to roll. The final step: embed this in my chest glue this to a cheap shirt and become a genius-billionaire-philanthropist.

Alligator clips not used in final version.
A bit thicker than I would have preferred, but a man's gotta do what a man's gotta do.

If only this thing actually did what it does in the movies.

Sunday, October 16, 2011

Mechanical Iris V2 Update

It works! Well, most of the time. The miniature four-leaved iris that I designed was finally cut at the Saturday Thing. Despite the fact that somebody reserved the 120 watt epilog and didn't show up to use it, we got along just fine with the 60 watt. Also, it's been 8 hours since I was in the FabLab, and I still smell like burnt wood.


If only one could make a living by making random things that serve no purpose.
Notes for next time:

Make it bigger.
One of the reasons that the first iris worked so well is that it's parts were bigger (radius 10") so slight errors in the alignment of the pins affected the overall performance less. With the miniature iris, (radius 4") the best I could do for pins was an assortment of machine screws which leave quite a bit of wiggle room so the parts can misalign themselves and piss me off when I try to use it.

Find better quality wood.
I cut this out of 3/16" luan, which is synonymous with crappy plywood. Every piece of luan that I've come across has been slightly bowed. Laser cutters don't like it when materials are out of the beam's focus, and so in order to inform you of this fact, they leave large scorch marks on the top of your object, and the width of the cut increases greatly.

Make some sort of handle.
As impractical as this thing is, when I do decide to fool around with it, it's tough to hang on to and requires two sizable man-hands to operate smoothly.